Getting Started
Contents
Installing Ultibo core
Starting embedded programming can sometimes involve many hours of work before you get to write even a single line of code, Ultibo core takes the pain out of getting started by packaging everything you need in a simple downloadable installer for Windows.
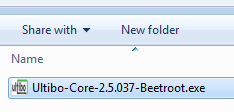
The installer includes the Free Pascal compiler, Lazarus IDE and the Ultibo core source all configured and ready to start creating applications. Get the Ultibo core installer from the download page and save it to a temporary location on your computer.
Ultibo core is quite safe to install on any Windows computer, nothing other than the items above is installed and everything is contained in a single folder (normally C:\Ultibo\Core). Even if you already have either Lazarus or Free Pascal installed, they will not be affected because Ultibo core installs into a different folder and keeps its settings separately from the official FPC and Lazarus installations. If you decide later that it's not for you then you can simply uninstall and everything will be removed.
You should only ever download Ultibo core using the link on the official download page, our aim is to provide you with quality development tools but there are others who have different intentions.
When you're ready to get started double click on the Ultibo core installer file you downloaded and select the language for the installation when prompted.
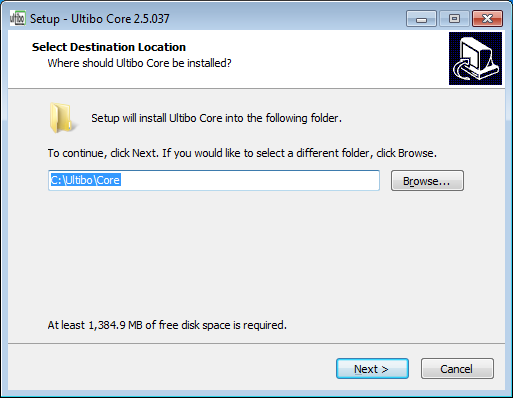
The installer will ask you where to install Ultibo core, by default this will be C:\Ultibo\Core but you can select a different folder if that suits you.
Note: Due to a limitation in the compiler you cannot select a path with spaces in it like C:\Program Files\Ultibo.
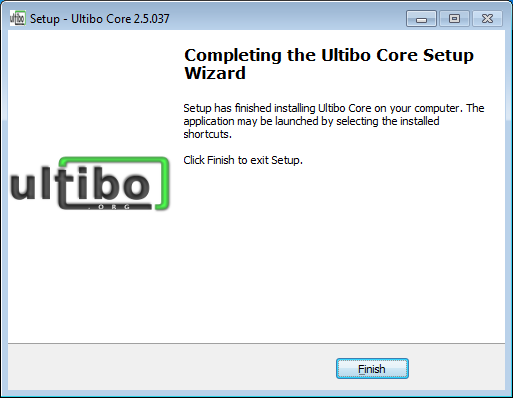
After a couple of other questions the installer will proceed to copy all of the necessary files to the folder you selected and configure the installation, when it is completed you will see a dialog like the one below. If everything was successful you can select finish and get on with creating your first application.
Introduction to Lazarus
Lazarus is an IDE or integrated development environment, the first thing it provides is a source code editor with syntax highlighting, auto indentation and auto completion. But it also offers many more advanced features like code completion, parameter preview, single click navigation and integrated error highlighting during compiling. You can learn more about Lazarus and the many ways it can make coding quicker by visiting the documentation or through the built in help.
Open Lazarus IDE by selecting the icon in the start menu.
At the top of the screen you will find the Lazarus main bar, this contains all of the menu options to open, save and close projects and files and gives you access to a whole range of options to customize what you see on screen. The main bar also contains a toolbar with some commonly used items, you can add others by right clicking and selecting options.
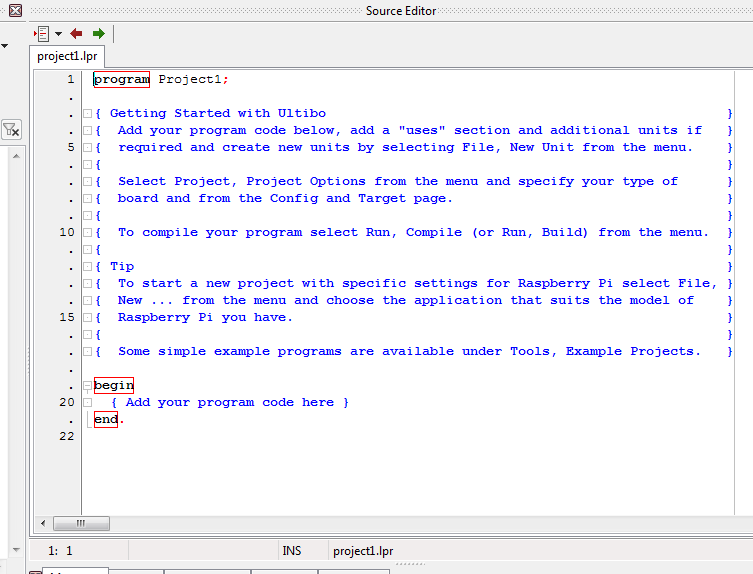
Below the main bar is the source editor, this is where you edit your code to create your application. The source editor can have multiple tabs each with a different file open so you can quickly navigate between the units in your program.
Starting a new project
Enough with the introduction, let's make something! First step is to start a new project by selecting Project, New Project ... in the Lazarus menu.
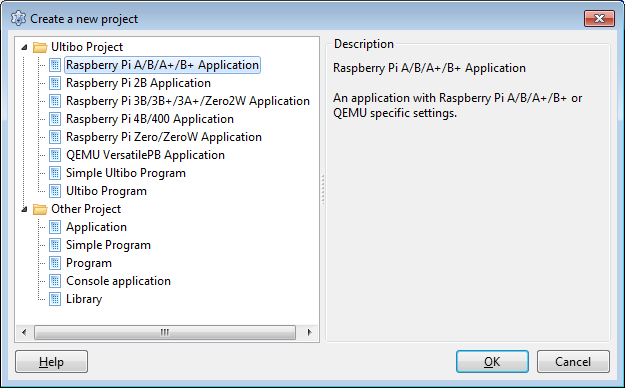
We've defined some basic project templates to make it simple to start a new project, there isn't much difference between them except the options that have been chosen. Select the one that suits the type of Raspberry Pi you have available.
Hint: To find the difference between a Raspberry Pi project and a Raspberry Pi 2 project, have a look under Project, Project Options ..., Config and Target in the menu.
The Hello World example
Creating a new project probably left you with a source editor window in Lazarus called project1.lpr and some text. Let's turn the new project into a working application.
Notice at the top of the source editor page there is a line that says program Project1, this tells the compiler that this is a program and it should make an executable when we compile this. If the line started with the keyword unit instead then this would be a unit that we could use in a program but it would not compile as a complete program on its own.
Units are a very useful way to break a project into pieces so that related code can be grouped together and reused in multiple places. We need to include a couple of Ultibo units now to start creating our hello world example. Find the section in the editor that starts with uses and change it to look like this:
uses
 RaspberryPi,
 GlobalConfig,
 GlobalConst,
 GlobalTypes,
 Platform,
 Threads,
 SysUtils,
 Classes,
 Ultibo,
 Console,
 Framebuffer
 { Add additional units here };
Notice that we added the Console and Framebuffer units to the list, this tells the compiler to include them as part of our project so we can use their functions in our code.
Directly below the uses section and before the begin keyword add a new section, we'll explain later what it does:
var
 WindowHandle:TWindowHandle;
Our code goes between the begin and end keywords, since this is a hello world example you might think it would only be one line but we need a couple of extras to deal with some housekeeping in Ultibo. The first line of our application will look like this:
WindowHandle:=ConsoleWindowCreate(ConsoleDeviceGetDefault,CONSOLE_POSITION_FULL,True);
This calls the ConsoleWindowCreate function in the Console unit, the first parameter required is a console device so we also call ConsoleDeviceGetDefault to get the first available console device (there should only be one) and pass it to the function. The next parameter is the position of our window so we pass the constant CONSOLE_POSITION_FULL, the final parameter tells the function if it is okay to make this the default window so we pass the value True for that.
The result of the ConsoleWindowCreate function is stored in the variable WindowHandle which we created in the var section above. A variable is just a place to store a value so you can use it over and over again.
Now we can print our hello world message in the console window we just created. This looks like:
ConsoleWindowWriteLn(WindowHandle,'Hello Ultibo!');
Here we call the ConsoleWindowWriteLn function and pass the variable WindowHandle so it knows where to write the text, of course the second parameter is the text we want to display.
Finally we need to tell Ultibo core to halt the thread that has been doing this work for us. Ultibo core is always multi threaded so you should never let the thread that starts your program (the main thread) exit the begin..end section of the program. We can halt the thread by calling ThreadHalt like this:
ThreadHalt(0);
Our hello world program should look like this now:
begin
 WindowHandle:=ConsoleWindowCreate(ConsoleDeviceGetDefault,CONSOLE_POSITION_FULL,True);
 ConsoleWindowWriteLn(WindowHandle,'Hello Ultibo!');
 ThreadHalt(0);
end.
Compiling the project
We better save our example first so we can find it later, select Project, Save Project ... and select a folder to save it to, probably best to create a new folder somewhere and remember the folder shouldn't have any spaces in the name. You can change the name of the project file to something other than project1.lpr if you like.
To compile our example we need to create a linker script and a makefile and download a toolchain and..., no we don't need to do any of that!
Just select Run, Compile in the menu and Lazarus will pass all the information needed to Free Pascal which will create the executable.
If the top line in the messages window (below the source editor) turns green then compiling was successful and the application is ready to test.
Making a bootable SD card
To test the application you'll need an SD card, pretty much any size will do because the application will be less than 2MB. The SD card needs to be formatted using the FAT filesystem (most of them are when you get them) and you need to copy these files to the root directory:
bootcode.bin
start.elf
fixup.dat
kernel.img OR kernel7.img
The first three are part of the Raspberry Pi firmware which you can find in the firmware folder under your Ultibo core installation (normally C:\Ultibo\Core\firmware) or you can download the latest versions at the Raspberry Pi firmware GitHub page, the fourth one you will find in the folder where you saved the example project to. If your project was for Raspberry A, B, A+, B+ or Zero then the file will be kernel.img, if you chose Raspberry Pi 2B when you started the project then the file will be kernel7.img instead.
Testing your project
Shutdown and unplug your Raspberry Pi if it is already doing something else, remove any SD card that is currently in the slot and insert the one you copied the files to above.
Plug in the power and in about 2 to 3 seconds you should see a screen with the "Hello Ultibo!" message displayed.
If you don't, check that the power is connected and the SD card is inserted corrected, check that a monitor is connected to the HDMI port on the Raspberry Pi and the monitor is powered on and try again.
What next?
Included in the Ultibo core installation are a number of examples that you can use to explore both Ultibo core and pascal programming. The examples start with hello world so you can skip that one and go through all sorts of different features to end up at a fully functional web server as the last example.
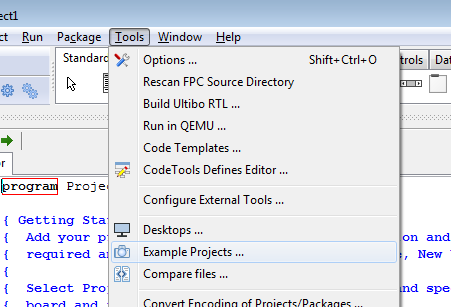
To try out the examples just select Tools, Example Projects ... in Lazarus.
Have fun and be sure to check the forum if you have any questions.
